
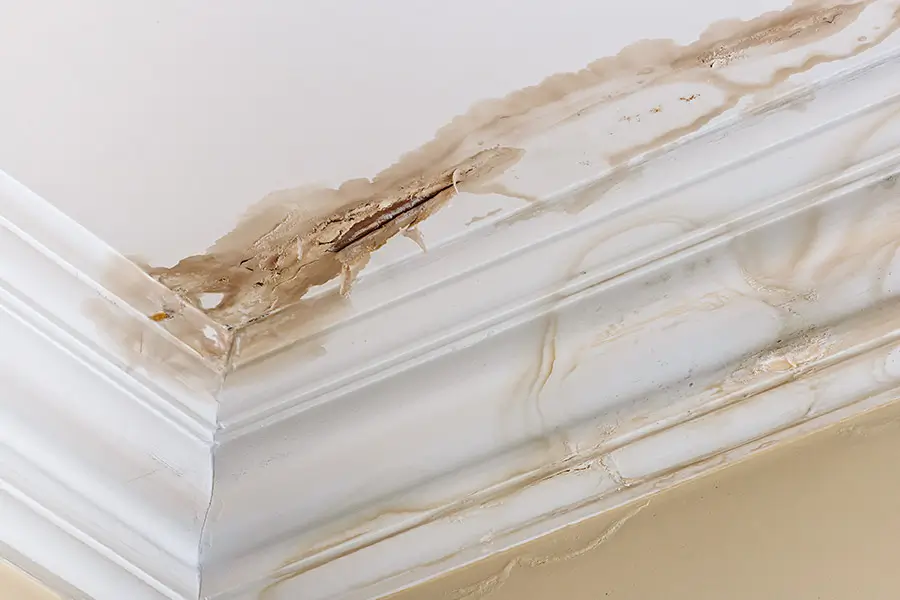
As a homeowner, keeping your property safe from leaks is essential for maintaining its value and comfort. You might be surprised how small measures can prevent significant damage and costly repairs. From inspecting your roof for damage to ensuring windows and doors are sealed, each step plays an important role in safeguarding your home. But have you ever considered the impact of water pressure on your plumbing system or the benefits of using water detection devices? These strategies are the game changers you need. Let’s explore how to shield your home from unwanted water damage effectively.
Regularly Check for Drips
Make it a habit to inspect all faucets, pipes, and fixtures in your home for any signs of dripping or leaks. Begin by visually examining each faucet, paying close attention to the base and connections. Look for water stains or pooling beneath the sink. Next, run your fingers around the joints and seals of the pipes. If you feel moisture, a slow leak may need addressing.
Move to the water supply lines connected to dishwashers and washing machines. Check for condensation or water droplets. Listen for any hissing sounds, which might indicate a leak or pressure issue.
For toilets, add a few drops of food coloring to the tank. After 15 minutes, if the color appears in the bowl without flushing, you’ve got a leak in the flapper valve.
Remember outdoor faucets and hoses. Inspect them for drips, especially after use. Tighten any loose connections and replace damaged washers if necessary.
Inspect the Roof for Damage
Begin your roof inspection by visually examining the shingles for any signs of curling, cracking, or missing pieces. These issues can lead to leaks, allowing water to infiltrate your home’s structure. Pay attention to the condition of the flashing around chimneys and vents, as they’re common failure points.
Next, follow this step-by-step guide to guarantee a thorough inspection:
- Check for Granule Loss: Look for excessive granules in gutters or downspouts. This could indicate aging shingles that need replacement. Granules protect shingles from UV rays and weather damage.
- Inspect the Attic: From the inside, look for any signs of water stains, mold, or damp insulation. These are indicators of potential roof leaks that need immediate attention.
- Evaluate Roof Valleys: These areas channel rainwater and are prone to damage. Confirm they’re clear of debris and that the shingles are intact to prevent water pooling.
- Assess Structural Integrity: Look for sagging areas or uneven rooflines. These can be signs of significant structural issues and require professional examination.
Seal Windows and Doors
To effectively prevent leaks, ensure all windows and doors are properly sealed by using weatherstripping or caulk to close gaps or cracks. Begin by inspecting each window and door frame for visible gaps or drafts. At night, you can use a flashlight to identify leaks; shine it from the inside and have someone observe from the outside. If light escapes, sealing is required.
Measure the perimeter of your window or door to determine the length needed for weatherstripping. Choose the appropriate material, such as foam tape, felt, or V-strip. Clean the surface with a damp cloth to guarantee adhesion. Cut the weatherstripping to fit and apply it along the edges, pressing firmly to secure.
If caulking is necessary, select a high-quality, waterproof exterior caulk. Cut the nozzle at a 45-degree angle and load it into a caulking gun. Apply a continuous bead along the joint, maintaining steady pressure. Smooth the bead with a damp finger or tool for a neat finish. Allow the caulk to cure according to the manufacturer’s instructions.
Check seals regularly for wear and replace them as needed. By doing so, you can prevent leaks and contribute to energy efficiency and comfort in your home.
Monitor Water Pressure
Regularly check your home’s water pressure using a pressure gauge to prevent potential leaks and damage to plumbing fixtures. High water pressure can strain pipes, leading to leaks, while low pressure might indicate existing issues. Monitoring water pressure is a proactive step in maintaining a safe and efficient plumbing system. Here’s how you can effectively manage it:
- Obtain a Pressure Gauge: Purchase a reliable pressure gauge from a hardware store. Verify it’s calibrated for accuracy. Attach it to an outdoor faucet or hose bib.
- Test the Pressure: Turn off all water outlets inside the house. Connect the gauge to the faucet and turn on the water. An ideal reading between 40 and 60 PSI is ideal. Readings above 80 PSI indicate high pressure, necessitating immediate action.
- Install a Pressure Regulator: If pressure readings are consistently high, install a pressure regulator on the main water line. This device adjusts the pressure to safe levels, protecting your plumbing system.
- Schedule Regular Checks: Make it a habit to check your water pressure monthly. Consistent monitoring helps in early detection of potential problems, allowing you to address them before they escalate.
Clean Gutters Frequently
While monitoring your water pressure, don’t neglect the importance of cleaning your gutters frequently to prevent water damage to your home’s foundation and exterior. Start by gathering the necessary tools: a sturdy ladder, work gloves, a garden trowel, and a hose with a spray nozzle. Safety first—confirm that your ladder is stable on level ground.
Using the trowel, remove debris like leaves, twigs, and dirt from your gutters. Wearing gloves protects your hands from sharp objects and bacteria. Once cleared, check for any signs of rust or damage. If you find loose or sagging sections, re-secure them with screws or sealant.
Next, flush the gutters with water using your hose. This step helps identify clogs in downspouts. If water doesn’t flow freely, use a plumber’s snake to clear obstructions. Confirm the water flows away from your house to prevent soil erosion around the foundation.
Maintain Plumbing Systems
Consistently check for leaks by inspecting exposed pipes and fittings, paying close attention to any signs of moisture or corrosion. Detecting issues early minimizes potential water damage and costly repairs. Here’s a step-by-step guide to maintaining your plumbing systems effectively:
- Inspect Pipe Joints and Connections: Examine pipe joints and connections for signs of wear, rust, or leaks. Tighten any loose connections using a wrench, confirming they’re secure but not over-tightened, which might cause damage.
- Monitor Water Pressure: High water pressure can strain your plumbing system. Use a water pressure gauge to measure household pressure. Ideally, it should be between 40 and 60 psi. Adjust the pressure regulator valve if necessary to maintain safe levels.
- Schedule Regular Professional Inspections: Engage a licensed plumber annually to conduct a thorough inspection, identifying hidden issues in hard-to-reach areas. Their expertise guarantees extensive maintenance beyond what you might observe.
- Replace Old or Faulty Fixtures: Faucets, showerheads, and valves can degrade over time. Replace them with high-quality fixtures, focusing on those with water-saving features to prevent leaks and conserve water.
Use Water Detection Devices
After maintaining your plumbing systems, install water detection devices near potential leak sources to quickly identify hidden leaks and prevent water damage. These devices act as an early warning system, alerting you to moisture presence before significant issues arise. Identify common leak-prone areas, such as under sinks, behind toilets, near water heaters, and around washing machines.
Select a reliable water detection device with features like audible alarms, Wi-Fi connectivity, and smartphone alerts. These features guarantee you’re notified immediately, even if you’re not at home. Once you’ve chosen a device, place it on the floor or mount it on a wall, ensuring the sensor is close to potential leak sources. Follow the manufacturer’s instructions for installation, which typically involves placing the sensor in a horizontal position and securing it with adhesive strips if necessary.
Test the device by briefly dampening the sensor with water to confirm the alarm functions properly. If compatible, integrate the device with your home automation system, allowing streamlined monitoring and alerts. Regularly check the device’s battery life and functionality to maintain its effectiveness. Using these devices, you can proactively protect your home and swiftly address leaks, serving others by preserving their environment.
Insulate Exposed Pipes
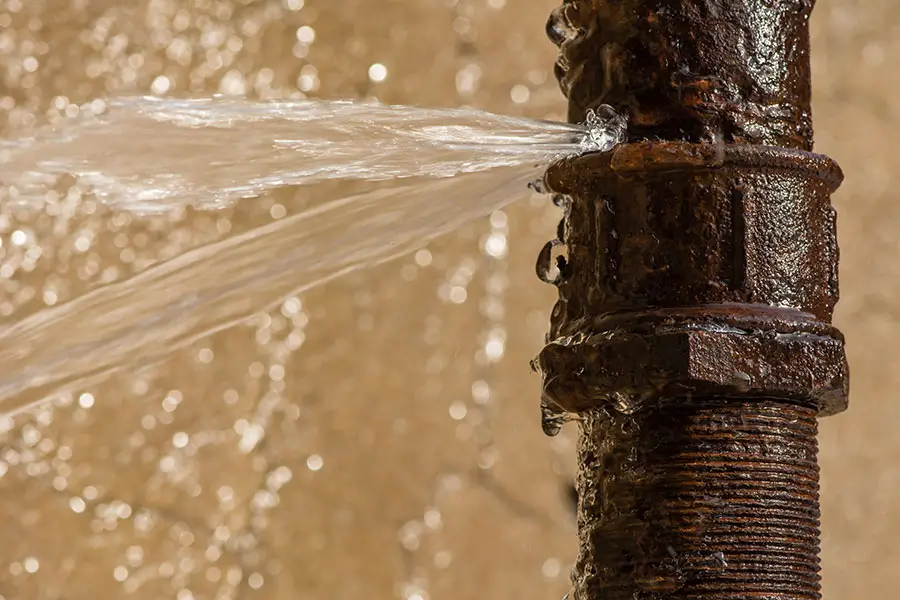
Consider insulating exposed pipes to prevent freezing and bursting during cold weather, guaranteeing your plumbing system stays intact. Insulation acts as a thermal barrier, reducing heat loss and maintaining the temperature of water flowing through the pipes. Here’s a step-by-step guide to properly insulate your exposed pipes:
- Identify Exposed Pipes: Locate pipes visible and vulnerable to cold air, such as those in unheated areas like garages, crawl spaces, and attics.
- Choose Insulation Material: Select appropriate insulation materials such as foam pipe sleeves, fiberglass, or rubber insulation. Foam sleeves are easy to install, while fiberglass is suitable for higher temperature tolerance.
- Measure and Cut Insulation: Measure the length and diameter of the pipes, then cut the insulation material to match. Guarantee a snug fit, as gaps can reduce the insulation’s effectiveness.
- Install and Secure Insulation: Wrap the insulation around the pipes, securing it with duct tape or zip ties. Pay special attention to corners and joints to cover all exposed surfaces.
Examine the Basement for Moisture
Start by thoroughly inspecting the basement for any signs of moisture, focusing on corners, walls, and areas around windows or plumbing fixtures. Utilize a flashlight to enhance visibility, paying close attention to discoloration or efflorescence, which indicates water presence. Keep a hygrometer to measure humidity levels, aiming for a reading below 50% to prevent mold growth.
Check for condensation on pipes or windows, which may suggest inadequate ventilation. Inspect floor drains and sump pumps for obstructions, confirming they’re functional and straightforward. Examine the basement walls for any cracks or gaps, as these can be potential entry points for water. Use a moisture meter to assess the wall’s moisture content, targeting readings below 15%.
If you notice any damp or musty odors, they may point to hidden moisture problems. Consider using a dehumidifier to regulate humidity levels. Be proactive by sealing any identified cracks with hydraulic cement or waterproofing sealant. Ascertain proper grading of exterior soil to direct water away from the foundation. Regularly maintain gutters and downspouts, ensuring water is channeled at least 6 feet from the home, preventing basement leakage.
Schedule Professional Inspections
Regularly schedule professional inspections to identify and address potential leak issues before they escalate into costly repairs. By enlisting the expertise of a certified home inspector, you can guarantee that your home remains a safe and dry environment for your family and guests. Here’s how you can make the most out of professional inspections:
- Research Qualified Inspectors: Start by seeking recommendations or searching online for certified inspectors with extensive experience in leak detection. Verify their credentials and read reviews to guarantee they meet your service standards.
- Develop a Maintenance Schedule: Establish a routine for inspections, ideally every six months. Consistent evaluations will help catch early signs of leaks or water damage, preventing larger issues.
- Prepare for the Inspection: Before the inspector arrives, clear access to critical areas such as basements, attics, and crawl spaces. This will facilitate a thorough assessment and help the inspector identify hidden vulnerabilities.
- Follow-up on Recommendations: Review the report and prioritize any recommended repairs or maintenance tasks after the inspection. Prompt action on these suggestions will safeguard your home against future leaks.